How to Implement Live Chat in Sharepoint


How to Implement Live Chat in Sharepoint

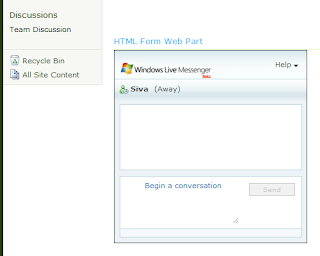
This feature of the Windows Live Messenger application enables you to actually add a web-based messenger to your site or blog.

Check out http://settings.messenger.live.com/applications/websettings.aspx to create one for yourself.

I will explain in brief.

Here http://settings.messenger.live.com/applications/WebSettings.aspx
you will see a setting for "Show your Messenger Status on the Web"

The checkbox "Allow websites to see your Messenger status and send you messages"
will allow any one to message you from the gadget.

You can place the gadget on any web page by copying the html code.


To get the HTML code click here
http://settings.messenger.live.com/applications/CreateHtml.aspx

At the bottom you will find these instructions.
"Copy the HTML and paste it into your webpage"
Comments

Popular posts from this blog

SPFx Fantastic 40 Web Parts

SPFx Fantastic 40 Web Parts Ref Link :  https://github.com/OlivierCC/spfx-40-fantastics Menu & Carousels & News Management Overview Web Part Description News Carousel Insert a classical, responsive, cool & touch ready News Carousel. With this web part, you can add easily news focus in your SharePoint site. The users can easily navigate in news items, with buttons or with touch. Tiles Menu This Web Part allows you to very easily create a menu in form of tiles that is responsive and adapted for mobile. You can directly manage the items on your menu, with a title, an image and manage Visual rendering options. 3D Carousel Insert a 3D Carousel in your SharePoint pages. With this Web Part, you can manage your menu items and create automatically a 3D carousel. Coverflow Generates a Coverflow Apple like menu in your pages. Manage your menu items with title and picture and create a cool coverflow menu. News Slider Insert a News Slider Tiles control to your pages....

HOW TO CREATE A SHAREPOINT EMPLOYEE DIRECTORY?

Option 1: Use the Contact List Web Part available in SharePoint If you are a small organization, you can simply use an out of the box Web Part called Contacts to manage contact information. The beauty of this approach is that you can customize your Contacts Web Part with any columns/metadata that you wish. That means you can add all sorts of phone numbers, notes, other information and group/organize it in any way you wish on your SharePoint site or page The second option when it comes to  SharePoint Employee Directory  is to create custom sites/pages using  Content Search Web  part. This option works well when you have a larger organization and want to create an Employee Directory that allows you to filter the different properties using left-hand-side metadata criteria. You do need to be an advanced SharePoint User to create this sort of Directory. If you are comfortable with some customization and want to give it a try, here are couple of blog posts ...

SharePoint Enable RMS Using Object Model

Step 1 Enable IRM on the farm SPWebService svc = SPFarm.Local.Services.GetValue (); SPIrmSettings irmSettings = svc.IrmSettings; irmSettings.IrmRMSEnabled = true; //set true or false based on the situation irmSettings.IrmRMSUseAD = true; irmSettings.IrmRMSCertServer = "certificate server here"; irmSettings.IrmChanges = irmSettings.IrmChanges + 1; svc.Update(); Step2 Set the IRM properties for a document library SPSite site = new SPSite("http:////"); SPList spList = site.OpenWeb().Lists["list_name"]; SPFolder folder = spList.RootFolder; spList.IrmEnabled = true; //corresponds to "Restrict permission to documents in this library on download" // BELOW SET=2, RESET=0 folder.Properties["vti_irm_IrmPrint" ] = 2; // Allow users to print documents folder.Properties["vti_irm_IrmVBA" ] = 2; // Allow users to access content programmatically folder.Properties["vti_irm_IrmOffline"...